In Sensei, as with the other courseware plugins covered at this time, creating a course is as simple as creating a new blog post. Select Courses from the Dashboard and click on Add New. Enter the name of your course.
Full Answer
How do I create a course page in WordPress?
Let's take a look at how you can create an online course for free using WordPress in seven simple steps:Download and Install the LearnPress Plugin.Create a New Course.Configure the Course Settings.Add the Lessons to Your Course.Create Quizzes.Link the Lessons and Quizzes to the Course.More items...•
How do I edit the course page in WordPress?
3:472:05:54How To Make An Online Course Website With WordPress ... - YouTubeYouTubeStart of suggested clipEnd of suggested clipI just drag and drop it that's all you really have to do if I want to edit the content of the lessonMoreI just drag and drop it that's all you really have to do if I want to edit the content of the lesson. I just scroll over to the right and click on edit.
How do I add a course on LearnPress?
Go to LearnPress > Courses. Scroll down until you get to the Curriculum section, then locate the Section where you want to add lessons and/or quizzes. Click the Select items button. Choose between the Lesson and Quiz tabs, then locate either the lesson or quiz you wish to add to your course.
Can I host my course on WordPress?
There are many online course platforms that you can use to build and sell courses. This includes Teachable, Thinkific, Kajabi, Udemy, etc. You can use any of them alongside your WordPress website. Depending on your needs, these platforms may offer an easier online course creation solution.
What is a course page?
The course page content area is where you add a course title, description and featured image for your course. This is what people will see before they enroll (or purchase) the course.
How do I use a WordPress course?
0:432:20:01WordPress for Beginners | FREE COURSE - YouTubeYouTubeStart of suggested clipEnd of suggested clipAnd we'll also get familiar with the dashboard. The second chapter is dedicated to contentMoreAnd we'll also get familiar with the dashboard. The second chapter is dedicated to content management here you'll learn how to work with posts. And pages how to upload media how to manage comments.
How do I add an instructor to WordPress?
In order to do this, please go to your WP-Admin > Users > Search for the user and Edit > In the Edit User window, under the Role drop-down field, choose Instructor > Save. After that, the user's role will be changed to Instructor and your instructor will be able to add courses.
Which is better LearnPress or Tutor LMS?
Tutor LMS has an option of recurring payments as opposed to LearnPress. On the other hand, it does not provide the user with significant eCommerce analytics. Both plugins offer one-time payments.
Which is better Moodle or WordPress?
Having the capability for students to upload their own files is a great benefit when teaching certain classes. Because of the way that Moodle was written with PHP it has more security concerns than WordPress. WordPress has had its own share of security issues as well, but Moodle suffers from more of them.
How do I create an online course?
How to create an online courseChoose the right subject matter.Test your idea.Research the topic extensively.Write a course outline.Create the course content.Bring your course online.Sell your online course.Market your content.More items...•
How do I create an online training course?
How to Create Online Training Courses in 5 Incredibly Easy StepsStep 1: Define Your Online Training Goals and Learner Persona. ... Step 2: Create an Outline for Your Online Training. ... Step 3: Build the Content for the Online Training Courses. ... Step 4: Engage Your Learners. ... Step 5: Measure Meaningful Engagement Metrics.
How do I set up an online class?
0:4622:13The Perfect Tools & Setup for Online Classes & Workshops - YouTubeYouTubeStart of suggested clipEnd of suggested clipQuality I put an external webcam that I've connected via USB. And then so that I don't have toMoreQuality I put an external webcam that I've connected via USB. And then so that I don't have to awkward the awkwardly work on the laptop here in this raised.
Description
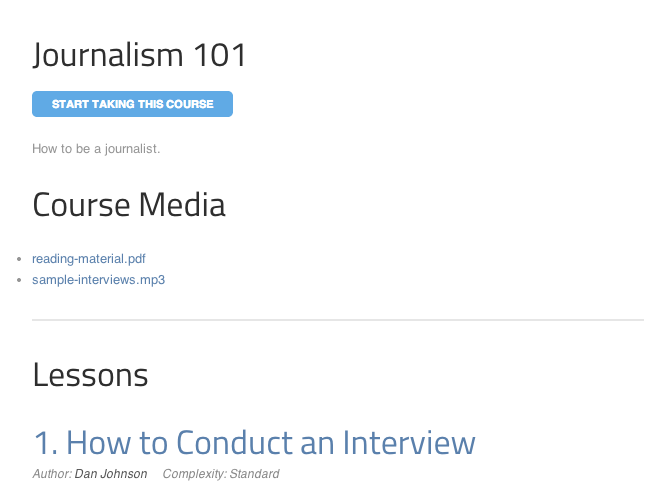
Sensei LMS Post to Course Creator takes the wealth of information you’ve already gathered in your blog posts, and turns it into an online course.
Screenshots
Log into your WordPress admin panel and click on Plugins in the sidebar.
What Is a Learning Management System?
Before we dive into how to use WordPress and Sensei, let’s talk some about learning management systems. In simplest terms, a learning management system (LMS) is a tool that allows educators to deliver lessons and administer courses online. This can be part of an online schooling program or for professional training.
How They Work
There are several steps that go into creating an LMS, beginning with creating the course you’ll be teaching. Some people may choose to write their course content inside the LMS itself, while others may upload their content from existing material. You can also include sources from online material, such as essays, videos, news articles, and more.
Benefits of Using an LMS
There are a number of benefits of using an LMS, some of which we’ve learned in the last year.
Using WordPress as an LMS
If you’re familiar with WordPress, you might be surprised to learn you can use it to create a learning management system. WordPress is an incredibly versatile site-building tool that makes it easy for anyone from beginners to web coding experts to create their own website.
What Is Sensei?
Sensei is one of those LMS plugins that can help you easily create the learning system you need. Because Sensei is a WordPress plugin, it can integrate seamlessly with your site and make it easy to set up your courses.
Benefits of Using Sensei
One of the best things about using Sensei to build your LMS is that you don’t have to have any coding experience whatsoever. Writing a traditional LMS means hiring a developer with experience creating these systems. But with Sensei, you just install the plugin with your favorite theme, and you’re off to the races!
How to Install Sensei
When you set up your LMS, your first step is going to be installing Sensei on your WordPress platform. Make sure you have your WordPress website set up, including selecting a compatible theme (more on that later).
My Courses
The My Courses page is comprised of two blocks – Learner Messages Button and Learner Courses:
Learner Messages Button
The Learner Messages Button block enables learners to view their private messages with the teacher. This block is only displayed if the learner is logged in and private messaging is enabled in Sensei’s settings. Clicking the button takes the learner to a page that shows all of their messages.
Learner Courses
The Learner Courses block displays a list of courses the learner is currently enrolled in. There are separate views for filtering by active or completed courses, and the block’s settings enable you to customize colours and select which elements to display.
For experts, academics, coaches, marketers, and agencies
Provide certification training, formal education, or simply share your knowledge — Sensei LMS can help you accomplish all your course creation goals.
Craft courses your students will love
Create courses directly in the WordPress editor and customize them to your brand and course requirements.
Create content to reinforce and assess knowledge
Integrate videos, slideshows, image galleries and other rich media into your lessons and quizzes to reinforce concepts and assess their understanding of the subject.
Engage your students and track their progress
With Sensei you can easily manage your students, evaluate their grades, track course progress, and set a course content schedule. You can also provide personal attention and feedback via instant messaging.
Popular Posts:
- 1. which institute is best for medical transcription course in bangalore
- 2. what is financial management course
- 3. what is the best lsat prep course to take
- 4. how to write a college course curriculum
- 5. how long is billing and coding course
- 6. how long is medical assistant course
- 7. what is pmp training course
- 8. what is a course management system
- 9. what is business management course
- 10. how long is hvac course