How do you prepare for a show jumping course?
Jul 25, 2007 · Say the path you’re taking out loud. While you go over the course, talk yourself through the turns and lines you need to complete. Say them out loud so you have a better chance of remembering them later on. After you’ve gone through the course a few times, look away from the layout and try to recite the path you’re taking from memory.
How do I learn a new jump course?
May 24, 2019 · Overall, the approach run through the first three phases should feature gradual, consistent, controlled acceleration. As you begin the final steps, the idea is to bring maximum speed into the board, but still be under control. Keep your head up. If you look down at the board you’ll lose speed.
Is it hard to memorize the course for jumping events?
During the first jump course, you will meet new people in the base jumping community and you might even get to know more about the tricks and tips that other people will share with you. Apart from getting to know other people, the First Jump Course also provides you with an insight into the world of base jumping like no other.
How do you do a long jump step by step?
May 08, 2012 · Step 1: Ground Poles. Begin your horse’s jumping education by laying out a pole in the arena and riding him over it. If he is apprehensive, hand-walk him over it several times until he goes over without hesitating. You can make this a part of his regular flat work.
What is the 1st stage in preparation for jumping?
Phase 1: The Approach.
To understand how to achieve a better result without worrying about seeing strides, it's helpful to break down jumping into the five phases of jumping: the approach, takeoff, in the air, landing, and getaway.
To understand how to achieve a better result without worrying about seeing strides, it's helpful to break down jumping into the five phases of jumping: the approach, takeoff, in the air, landing, and getaway.
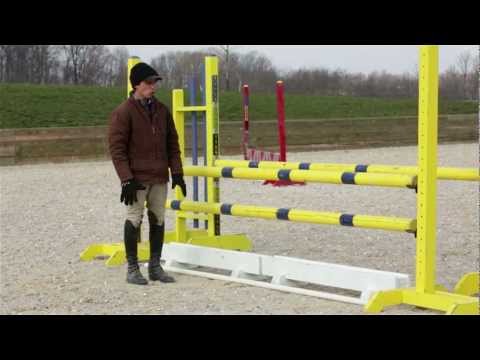
How do you set up a jump course?
1:02
8:11
Side get to the center of the joke. Put your butt up next to the row. Three six feet further landingMoreSide get to the center of the joke. Put your butt up next to the row. Three six feet further landing. So the horse should land about you. Now we're going to go on to actually walking the strides.
What are the 5 phases of jumping?
The jumping process can be broken down into five phases:
- Approach.
- Take-off.
- Flight, suspension, or airborne phase.
- Landing.
- Recovery, getaway.
How do you start a horse jumping?
You can train your horse to jump by having them first become comfortable trotting and cantering over ground poles, then slowly working your way towards a small jump over a cross rail. Once they have become comfortable with this, you can begin incrementally increasing the height of the jumps.Jun 4, 2019
How do you walk in a jumper course?
6:56
9:28
And then take take yourself through it walking on foot counting the strides to see where you'll beMoreAnd then take take yourself through it walking on foot counting the strides to see where you'll be at just as a kind of a gauge to see what would be. The straight centered approach and track for you.
How many steps is a double jump?
You should be able to ride the two jumps in a comfortable two strides.
What are the phases of a vertical jump?
The standing vertical jump has three phases: the preparatory phase, the propulsive phase, and the flight phase. A single vertical jump is made up of these three phases and also includes one other phase once the jump is over called the landing phase which was not looked at for this study.
What muscles are used in showjumping?
Let's take a look at a few of the key muscle groups involved in riding and why they are important to you as an equestrian athlete. These muscle groups will be split into upper body, abdominals, and lower body components.
...
Lower Body
...
Lower Body
- Hip Adductors: ...
- Hip Abductors: ...
- Hip Extensors:
Jun 5, 2018
How do horses see jumps?
Horses do not see the full spectrum of hues seen in show jumping courses. Equines have 'dichromatic' vision ('di' meaning two, and 'chroma' meaning colour) in blue and green. In human terms, horses are said to be red-green colour blind, unable to see reds as we do, probably viewing them as hues of blue-grey.
What is the correct jumping position?

Answer. The correct position should see the rider form a straight line from their shoulder, through their elbow and knee and down towards the ball of their foot. There should be a bit of room between their body and their horse's withers.Dec 26, 2018
When can you start jumping a horse?
Most riders begin jumping before a horse is fully grown (5-7 years). With proper judgement, fitness, and horsemanship, schooling younger horses over starter fences is acceptable.
How do you teach a nervous horse to jump?
Take your time, allowing your horse to go at a pace that's comfortable for him. Avoid forcing him to go over any obstacles if he is anxious, as this will damage his confidence in the long run. Praise and positive reinforcement will build his confidence and enjoyment of jumping.Oct 21, 2019
How many strides does a high school jumper take?
As they gain strength and stamina, they can lengthen their approaches to build more momentum. A typical high school jumper will take around 16 strides. Different coaches have differing thoughts regarding the first stride.
How to determine the start of an approach run?
One method is to stand with your back to the pit with the heel of your non-takeoff foot on the front edge of the board. Run forward the same number of strides you’ll use for the approach and mark the provisional starting point. Make several approaches from that provisional spot, then adjust your starting point as needed to make sure your final step hits the takeoff board.
Is the long jump a run and jump?
Mike Rosenbaum is an award-winning sports writer covering various sports and events for more than 15 years. The long jump can just as easily be named the “run and jump” or “sprint and jump,” because the actual jump is only part of the process. Yes, there are techniques for pushing off the board, for flying over the pit, and for landing.
How many strides to hit maximum velocity?
The goal is to hit the takeoff board at maximum velocity, while still under control. If you hit maximum velocity at 10 strides, it won’t help to take two more strides, because you’ll be slowing down, and won’t jump as far.
Why do long jumpers have shorter approach runs?
Therefore, young long jumpers will have shorter approach runs. As they gain strength and stamina, they can lengthen their approaches to build more momentum.
How to avoid fouling on the board?
Count on your training sessions to help you establish consistent strides so you hit the board and avoid fouling. Land flat-footed on the second-to-last step. Stretch a bit farther on this stride, to lower your hips and your center of gravity, and to place your center of gravity behind your front foot.
What foot do you use to jump off a long jump?
Generally, a right-handed long jumper takes off with the left foot . New jumpers may wish to try both to which style works best. When you hit the takeoff board, your body will actually be leaning slightly backward, with your foot in front, your hips slightly behind and your shoulders a bit behind your hips.
How to teach a horse to jump?
Begin your horse’s jumping education by laying out a pole in the arena and riding him over it. If he is apprehensive, hand-walk him over it several times until he goes over without hesitating. You can make this a part of his regular flat work. Eventually you can add poles in various spots throughout the arena, and walk, trot and canter your horse over them. Do not get into the jumping position; just maintain a gentle contact with the bit and encourage your horse with your legs.
How long does it take for a horse to learn to jump?
Don’t be afraid to take your time and work through these exercises very slowly. Some horses can take up to a year to learn how to jump correctly, and you don’t want to rush the process. The time you spend teaching your horse now will pay off throughout his jumping career. When in doubt, always be patient.
How to jump a horse?
Begin your horse’s jumping education by laying out a pole in the arena and riding him over it. If he is apprehensive, hand-walk him over it several times until he goes over without hesitating. You can make this a part of his regular flat work. Eventually you can add poles in various spots throughout the arena, and walk, trot and canter your horse over them. Do not get into the jumping position; just maintain a gentle contact with the bit and encourage your horse with your legs.
How to set up a horse grid?
To set up a grid, begin with two cross-rail jumps spaced about 10 feet apart (this can be shortened or lengthened depending on the size of your horse and the length of his stride). Trot your horse in, using a trot pole set 9 feet before the grid if desired.
How far before a fence should a horse be trotted?
Trot your horse in, using a trot pole set 9 feet before the grid if desired. Your horse should soon understand the concept of “bouncing” over the fences—that is, jumping and taking off with no stride in between the cross-rails.
Can a green horse jump out of a canter?
It’s best to approach each jump in a course at a trot while your horse is learning. If you ask green horses to jump out of a canter (particularly “hot” breeds, such as Thoroughbreds), they often rush their fences, jumping long and flat—the opposite of the desired round arc that is powered by the hindquarters.
How far apart should you put trot poles?
Step 2: Trotting Poles. When your horse can handle a single pole, lay out three or four trotting poles spaced 5 feet apart. Larger or smaller horses may need the distance adjusted to their stride. Trot your horse (posting) straight up to the middle of the poles, and use plenty of leg if he backs off or becomes hesitant.
How to make a story pole?
A story pole helps you space the courses more quickly. To make one , cut a piece of straight 2×4 to the height of the finished wall. Then mark the courses on the board, separating them by 3/8 inch for mortar joints.
How to make a footing with a half corner block?
Starting at one end of the footing with either an end block or half-corner block (depending on the length of the wall), set blocks without mortar. Place the edges on the chalked lines, spacing them with 3/8-inch-wide plywood. When you set the last block, snap perpendicular chalk lines to mark the ends of the row.
Do you have to wet blocks before installing?
Do not wet the blocks before installing them. Wet blocks expand, then shrink when they dry. If it rains or rain threatens, cover the blocks. Spread mortar only on the outside edges of the block (a technique called face-shell bedding), not on the cross web.
What is project initiation?
Project initiation is the first step in starting a new project. During the project initiation phase, you establish why you’re doing the project and what business value it will deliver—then use that information to secure buy-in from key stakeholders.
Project initiation vs. project planning
During the project initiation phase, you define your project at a high level in order to demonstrate its business value. Once you secure buy-in from key stakeholders and prove that your project is feasible, you then move on to the project planning phase.
Why does the project initiation phase matter?
Starting a new project is exciting, but it’s important to make sure your initiative will actually add value before jumping into the planning phase. That’s where project initiation comes in—it offers a structured approach to demonstrate your project’s business case and prove that the work you’ll do is feasible.
The project initiation process: 4 steps to get started
So you’ve come up with an enticing new project idea—now what? Here’s how to approach this first phase of project management and lay a solid foundation for your new project.
Next up: Project planning
The project initiation phase empowers you to lay a strong foundation for your project. It ensures that you prove the business need for your project, secure necessary approvals, confirm the feasibility of your work, and start to assemble your team.
Why should clear areas be set aside for step ups?
If racks are not available, clear areas should be set aside so athletes are free from possible interaction with balls or similar, mainly because vision is so limited when performing step-ups. Bench or Box: The laziest part of the exercise comes from setting up the right surface or box to step-up onto.
Is Petersen step up knee dominant?
The best example of this is the Petersen Step-up promoted by Poliquin, as it looks like a concentric-driven exercise and is very knee dominant. Other options are still knee dominant, but they get slightly more hip action if the free leg allows forward knee drive.
Is step up exercise worth it?
The step-up exercise doesn’t have much discussion about injuries, but Micha el Boyle has publicly positioned the exercise as not worth doing with k nee pathologies. Another leading expert, Bob Alejo, found the step-up to be very valuable with athletes.
Is Boyle correct about the stereotype of cheating in the exercise?
Boyle is correct about the stereotype of cheating in the exercise, or the excessive use of momentum. He has a very elegant summary of the exercise as hard to do well and easy to do poorly, but that has more to do with the coaching side, variation choice, and equipment.
Popular Posts:
- 1. which institute is best for medical transcription course in bangalore
- 2. what is financial management course
- 3. what is the best lsat prep course to take
- 4. how to write a college course curriculum
- 5. how long is billing and coding course
- 6. how long is medical assistant course
- 7. what is pmp training course
- 8. what is a course management system
- 9. what is business management course
- 10. how long is hvac course