WHAT TO DO: Step 1: Find a space with many trees or places where you can attach some strings to create your obstacle course. It can be in your backyard, a little wooded area or even in a park. Step 2: Attach and pass the yarn or string between the trees in the way you want to create obstacles.

0:52
2:29
Place a wooden ladder flat on the ground participants run the length of the ladder as fast as theyMorePlace a wooden ladder flat on the ground participants run the length of the ladder as fast as they can by stepping between each of the rungs. Step 3 lay eight hula hoops in a row. And this segment.
How do I make a simple obstacle course?
0:29
2:13
Course you're going to need a few solar garden lights a couple of pole noodles. And duct tape thisMoreCourse you're going to need a few solar garden lights a couple of pole noodles. And duct tape this way we'll be able to make a tunnel for your little one to army crawl through.
How do you make a maze with string?
0:00
2:05
You will need a pair of scissors. And some tape so once you get started you will go ahead and haveMoreYou will need a pair of scissors. And some tape so once you get started you will go ahead and have to measure. Out your string. From side to side in your hallway.
How do you make an obstacle course in your backyard?
Tie a hula hoop to a tree branch or clothesline to jump through, lay hoops on the ground in a row or pattern where kids must hop or step from one to next, or hold the hoop in two hands and skip with it. You can even try making your own hoops. Find more games here.May 18, 2020
How do you make an obstacle course for kids?

0:10
4:44
Up. Set your tubes in a row like. This. In the course run across the tubes making sure that yourMoreUp. Set your tubes in a row like. This. In the course run across the tubes making sure that your feet are in the middle of the holes.
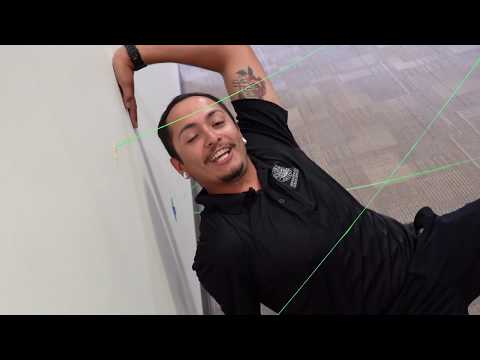
What is hallway laser maze?

Basically, you're just going to tape the crepe paper on the wall in a zig zag pattern, back and forth, high and low, moving down the hallway. The idea is to create a “maze” that your kids can then work their way through, like the laser mazes you often see on spy movies.
How do you make an obstacle course out of pool noodles?
Ground Crawling: Stick a yard stake in the ground and push one end of a pool noodle on it (pool noodles have a hollow middle with holes at both ends). Bend your pool noodle over to make a semi circle and push another yard stake in the ground where the pool noodle ends. Push the other end of the noodle on the stake.
What do you need for an obstacle course?
What You Need:
- Things to jump over, onto, or from. Interlocking foam play mats and tumbling mats are great. ...
- Things to crawl under or through. ...
- Things to throw. ...
- Things to balance on. ...
- If you're setting an outdoor obstacle course up in the backyard, there are plenty of ready-to-buy obstacles, as well.
Oct 12, 2021
How do you make a Ninja Warrior course in your backyard?
0:57
6:30
And the first thing I want to do is dig the holes for your posts you want to make sure that theseMoreAnd the first thing I want to do is dig the holes for your posts you want to make sure that these are at least two and a half feet deep I secured mine with a 2x4 held them in place.
What is the easiest obstacle race?
The easiest obstacle course race is the 5k Foam Fest. This course is great for families and is filled with foam and inflatables. Some other easy obstacle course races are the Terrain Race and Epic series. These races are great for beginners or anyone wanting to try out an obstacle course race for the first time.
What are obstacles examples?
18 Examples of Obstacles
- Financial. A lack of financial resources. ...
- Time. Time is a fixed resources such that consumption of time can be an obstacle. ...
- Health. Health problems can severely drain the time, energy, focus and resources of an individual.
- Resources. A lack of resources. ...
- Stability. ...
- Society. ...
- Cultural Capital. ...
- Education.
How much does it cost to build a Ninja Warrior course?
Industry leaders estimate a budget of $50,000 to $250,000, depending upon the size and complexity of the facility. Initial start-up costs include the following: Leasing/purchasing building large enough to comfortably build your obstacles — Gym owners report leasing 11,000 to 30,000 square feet for their gym.May 9, 2022
What are some good ways to make an obstacle course?
Consider inflatable obstacles . A safe and easy option for creating an obstacle course is to make use of inflatable obstacles. Since these obstacles are inflatable they pose a low risk of injury and can add an appealing and lighthearted feeling to your obstacle course.
What is the best place to build an obstacle course?
Look around for the best space available to you for your obstacle course. Hills might be obstacles themselves and can add difficulty to your course. Flat areas are a great location if you plan on building obstacles yourself that need to be level.
How to place obstacles on a course?
Place them according to plan. Having assembled your obstacles you can begin to place them according to your obstacle course layout plan. Place the obstacles where you planed them and evaluate their position before opening up our course to others.
How to overcome obstacles?
Including teamwork can be a great way to get your participants working together to overcome the obstacle course.
What are some challenges to add to a golf course?
Salmon runs, quad steps, and warp walls are all challenging obstacles you can add to your course.
How to test agility?
Running around a series of cones, like a skier slaloming, can be a good test of agility. Try tying small threads with bells attached to them just off the ground. Participants have to step around them without ringing the bells.
Do you need to build an obstacle course for your friends?
Building a simple obstacle course for your friends and family on the other hand will not require such steps.
What is a spy training obstacle course?
Spy Training Obstacle Course for kids from One Creative Mommy. An agility course that includes stepping through rings (just throw out some rings!), crawling under a table, and a tightrope!
Can kids have a crawler obstacle course?
Bonus Obstacle Course for Crawlers! Young kids can get in on the action too, even if you have a crawler. Set up couch cushions and pillows to have them crawl over and under propped up cushions! See our crawler obstacle course.
Step 1: Laser Maze
With streamers, a hallway and a little bit of tape, you can make your very own laser maze, extra points for new original ways to cross. This is a super fun activity with varying levels of intensity based on how you set it up to your liking, and is also very entertaining for both children and adults.
Step 2: Cushion Jump
The aim of the game here is to cross as quickly as possible and then go back to finish the rest of the obstacle course. This one is almost too easy to set up and is so much fun, you don't have to use cushions either if you don't want to any soft small item that you can hop onto will do.
Step 3: Dance Floor
All you need for this is painters tape and a tune, outline a square on the ground and decorate to your desire (or not) then, set your music and get ready to boogie,you may want to stay longer than the time you have . This one is very simple and very fun all you have to do is dance for one minute and its such a fun addition to the course.
Step 4: Army Crawl
Pretend you are in the army and crawl under the strings like a soldier, but don't forget to be fast. All you need is some string and tape, make sure it's not too high or too low.
Step 5: Tight "rope" Cross
It may not be a tight rope but it is just as challenging. Grab any pole and lay it on the ground, and with that setup is done. All you have to do is cross it without touching the floor (which is a lot harder than it seems) Make sure to cross fast because this obstacle course is timed and the prize is yours to choose.
Step 6: Finish!
Now that your done you can not only, have fun, be creative but also burn calories while doing it! I hope that you liked this project and that you try it out, remember thought if you cant do all of these or if you have other ideas, then feel free to cater this project to your needs.
How long does it take to build an obstacle course?
Depending on your design, it should only take a few hours to get your obstacle course up and running.
What do you need to make a seesaw balance?
You really just need some wood planks, pipe, 90 Degree Elbow fittings, and Single Socket Tee fittings.
What do you need to assemble a Kee Klamp?
In most cases, all you will need to assemble your project is an Allen Wrench or hex key.
Can you build an obstacle course on your own?
Have you considered building your own obstacle course? Sure, this type of project might seem impossible to complete on your own. But with the right materials, it’s actually easier than you think. Obstacle courses are fun for kids and can even be used as a team-building tool for adults.
Can you break down a Spartan race course?
You can also break down these structures to make a portable obstacle course. This is especially great if you want to design a course for a traveling event, like the obstacle courses used in the Spartan Races.
What is an obstacle course?
An obstacle course is a wonderful way to engage a young child in movement. These awesome obstacle course ideas for kids are simple and will provide hours of entertainment and learning. Although there are many different kinds of obstacle courses and ways to build them, they share several similarities. They use objects and structures as the obstacles ...
What are the similarities between obstacle courses?
Although there are many kinds of obstacle courses and ways to build them, they share several similarities. They use objects and structures as the obstacles to “conquer,” as well as a specific path the children must follow, in a set order.
What are some skills that kids can learn through obstacle courses?
Gaining control over their movements is an important skill that may be practised by kids through an obstacle course. Those types of skills can include walking a “tightrope” on the ground, skipping from one spot to the next, and climbing a playground ladder.
What are the benefits of obstacle courses?
What are the Benefits of an Obstacle Course? Beyond having fun and using energy, obstacle courses offer many skill-building advantages for the kids who take part in working their way through them. Some of these benefits can seem obvious, while others may be more surprising.
How to practice balance on a carpet?
Use string or wool on the carpet for a tightrope to practise balance.
How much is the Learning Through Play Activity Pack?
Would you like a year of done-for-you, ten-minute activities to teach your 3-5-year-old through play? Get your copy of the Learning Through Play Activity Pack for only $27.
What to use for outdoor course?
Use glow sticks and rings, along with porch lights and flashlights, for added fun to any outdoor course.
What is the goal of the Recycle Warrior obstacle course?
We recently took on this challenge and built our Recycle Warrior obstacle course! The goal was to create an obstacle course that students would love to participate in, all while promoting the importance of recycling.
What are the materials used in the Over Under Challenge?
Recycled materials make up the entire over-under challenge. The cans are the posts, and the bar across the top is made from plastic bottles. We just glued them all together to make them secure. To help hold it into place, we used two-liter bottles filled with sand. The bottles across the top balance gently on the cans, so they will move if students brush up against them. This adds to the fun, though! If someone knocks one off, you can decide to deduct points or add on to their race time. (We think a five-second penalty works.)
Why do we put a recycling bin at the end of the race?
Every good race has a good finish. Since we wanted to spread the message of how important it is to recycle, we put a recycling bin at the end of the course. After they made their way through the tunnel, students dunked their bottles into the bin. By having one with a small opening, like the one pictured here, it even added a bit of a challenge to the end!
What is a cardboard tunnel?
Every school can find extra cardboard to use. This cardboard tunnel is made of several different boxes to give students a section to crawl through. Remember, students still have to be holding their plastic bottle. Attaching all the boxes together really makes it challenging (and fun) for students.
What is roundabout in school?
The roundabout can be done in so many ways. It’s basically a way to bring in a challenge where students have to weave from one section to the next.
Who is Stacy Tornio?
Stacy Tornio is a freelance writer with a focus on education. She's an author of nearly 20 books, including many educational family titles. Nearly everyone in her family is a teacher. So she decided to be rebellious and write about teachers instead.
Can you put a recycling bin in the end of a classroom?
It really can be whatever you have. Just make sure students know that the items will go to the recycling bin at the end!
How to tie string for obstacle course?
Tie the string in various places, such as between the legs of a chair or across a doorway. Use tape wherever necessary. Mark a course with tape and ask your child to navigate through it without disturbing the string. If any string breaks or comes off, they have to start over. Outdoor Obstacle Courses.
What is an obstacle course?
An obstacle course is a set of challenges that the players have to maneuver their way around. While outdoor obstacle courses are best, you can set one up even at home on rainy or snowy days so that your children get the chance to burn all the extra energy within. Most parents love the idea of an obstacle course for kids.
What to do if you are looking for an army based obstacle course?
If you are looking for an army-based obstacle course, arrange a boot camp. It would be a mix of fun and exercises.
Why is obstacle course important in teamwork?
Obstacle courses improve the communication skills as a constant conversation is required to win the game.
What can you do with random materials?
You can do a lot of stuff with random materials you find at home. Things such as pool noodles are perfect for a backyard obstacle course for kids.
How to keep kids occupied?
If you want to keep your child occupied for quite some time, give them access to an obstacle course. Here are some ideas. Indoor Obstacle Course. 1. Indoor sack race. Image: Shutterstock. When your children cannot step out of the house but are restless, a good sack race helps to use their energy.
How to play with kids?
How to play: Give your child a burlap sack or a pillowcase. Map out a course in your living room with a start and finish line. Ask your child to jump to the finish line while wearing the “sack.”. If your child is adventurous, you can even place some shallow objects on their path to jump on, jump over, or jump around.

Popular Posts:
- 1. which institute is best for medical transcription course in bangalore
- 2. what is financial management course
- 3. what is the best lsat prep course to take
- 4. how to write a college course curriculum
- 5. how long is billing and coding course
- 6. how long is medical assistant course
- 7. what is pmp training course
- 8. what is a course management system
- 9. what is business management course
- 10. how long is hvac course