
1:19
13:05
It's gonna be oval with to 180 berms here the right firm sort of dug out a little bit it's gonna beMoreIt's gonna be oval with to 180 berms here the right firm sort of dug out a little bit it's gonna be a 10-foot radius. The whole track gonna have about four rollers about ten feet apart.
How to build a custom BMX bike?
Jul 23, 2007 · Pile the dirt to the desired height, and use a hose to dampen the top layer of the dirt. Use a flathead shovel or rake to pack the dirt down as tightly as possible so your front wheel …
What are some tips for building a backyard BMX track?
Step 4: Mounting the Motor and Inverter. Mounting. the motor may seem like an easy job. Just unscrew the old rim and screw back the new one with the motor, but there are some tricks. The …
Does the BMX bike fork include a race?
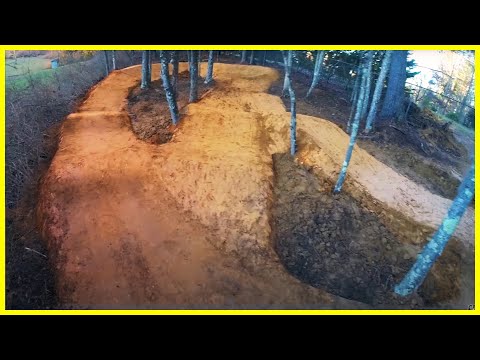
Feb 20, 2017 · You can dig the pump track right into a flat area in a lot of situations. In our case, we had an incline, so most of the dirt from the high side of the yard ended up being dug down …
How can I get my kids to create their own obstacle course?
Sep 19, 2018 · Pull out the cable and cut the extended part of it by a wire cutter. Through housing, make sure the inner cable is put back. Now, connect it to the brake arm. Tighten the bolts. You …
How do you build a pumptrack?

How to Build a Backyard Dirt Pumptrack
- Step one: Plan and design your track. Plan thrice, measure twice. ...
- Step two: Budget for and collect the materials and equipment you'll need. ...
- Step three: Constructing your track. ...
- Step four: Pack, water, ride. ...
- Step five: Final trim and landscaping.
How do you make a mini BMX track?
0:05
3:23
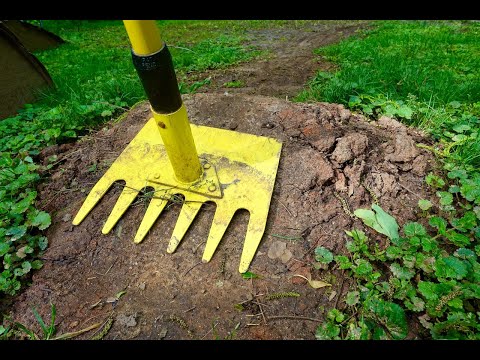
Before building foundation underneath the organic material we can find good usable dirt we can useMoreBefore building foundation underneath the organic material we can find good usable dirt we can use this to build the foundation of the course and as a base for the berms.
How do you make a bike track?
5:02
6:11
The back end features a drop on two rocks for a bit of a kid size challenge a simpler design couldMoreThe back end features a drop on two rocks for a bit of a kid size challenge a simpler design could be built using a series of two by eights or two by tens running the length of the skinny.
How do you make a berm BMX?

4:37
15:00
So structurally you're gonna be using the ground as the wall of your berm. And you're gonna beMoreSo structurally you're gonna be using the ground as the wall of your berm. And you're gonna be piling on top whereas. You don't need to build such a wide top to make the berm structurally.
How do you make a backyard track?
1:13
13:05
This is a broken Ottoman that I just put some chicken wire on and maybe find some rocks I can siftMoreThis is a broken Ottoman that I just put some chicken wire on and maybe find some rocks I can sift them out let's see how this. Goes. All right so after about maybe two and a half days of digging.
How do you make wooden mountain bike rollers?
0:00
7:20
Section I'll take you through the process of making a roller using something called laminated woodMoreSection I'll take you through the process of making a roller using something called laminated wood bending and we'll go over the various types of rollers.
How do you make a backyard bike trail?
Step-by-step Guide on How to Build a Mountain Bike Trail In Your Backyard
- Step 1: Find a location. The first thing to do is to look for a pleasant location. ...
- Step 2: Outline the trail. ...
- Step 3: Set up the foundations. ...
- Step 4: Build the backyard trail. ...
- Step 5: Add the trail features.
Apr 20, 2022
How long is the first straight of a BMX track?
It may also include unbanked turns. The course is wide enough to allow four riders to line up side by side, and to allow overtaking. The start straight is at least 30m long.
How big is a BMX track?
The overall length of a BMX track is required by the UCI, the governing body of world cycling, to be between 300-400m. The start ramp must be 9-10m wide, the first straight 8-10m wide and the remainder of the track no slimmer than 5m wide at any point.Mar 2, 2016
How do you make a BURM?
To build a berm, outline its shape and dig up any grass. Next, add the desired fill to the excavated area and begin packing around it with soil. Then, continue piling on the soil, tamping as you go, until you reach the desired height. The berm should carefully slope outward.May 30, 2021
How do you make a curved wall ride?
2:42
10:12
Making it basically a curved wall ride with enough speed we should just stick to the wall like oneMoreMaking it basically a curved wall ride with enough speed we should just stick to the wall like one of those motorcycle. Cylinder.
What does berm mean?
Definition of berm
1 : a narrow shelf, path, or ledge typically at the top or bottom of a slope also : a mound or wall of earth or sand a landscaped berm. 2 : the shoulder of a road deer …
1 : a narrow shelf, path, or ledge typically at the top or bottom of a slope also : a mound or wall of earth or sand a landscaped berm. 2 : the shoulder of a road deer …
Steps
Take a large piece of wood and cut 4 ramp shapes depending on how big you want your jump to be.
Warnings
Electric Saws can be dangerous, so be careful using this item. Use under parental supervision.
About This Article
wikiHow is a “wiki,” similar to Wikipedia, which means that many of our articles are co-written by multiple authors. To create this article, 66 people, some anonymous, worked to edit and improve it over time. This article has been viewed 165,424 times.
Step 1: Years Later.
After many improvements this is how mi bike looks today.
Step 2: The Bike
Nothing more to add here why it is a BMX. Having a tight budget still being a student when I started making this I wanted to save money for the electronics, so I bought online the cheapest used BMX that I could get with both front and rear brakes. So, this is just a cheap bike, you can of cohouse choose any bike you like to make it electric.
Step 3: Motor
I choose to use a hub motor, so a motor integrated in the rear wheel. I did not like the front motor as having the front wheel heavy it is not good for riding. And I did not like other motors, because they were difficult to fit on the bike.
Step 4: Mounting the Motor and Inverter
Mounting the motor may seem like an easy job. Just unscrew the old rim and screw back the new one with the motor, but there are some tricks.
Step 5: Battery
Main power source... the battery must be strong enough to provide high currents and have enough capacity for a long ride. I choose Wina 10Ah LiFe cells and connected 12 of them in series (43V fully charged). I used copper plates for connections and made "main" and "balance" cables with connectors.
Step 6: Finishing
To finish the project, I needed to connect the brake handles with safety switch to the controller. This handle "stops" the motor when you are braking. Next, I needed to connect the "thumb" throttle stick to enable power. This was also in the set with the motor and inverter, but I changed it for a "twist" stick as motorcycles have.
MCCORMACK'S TRACK TIPS
DESIGN: Avoid flat spots. "Every square inch should tilt up, down, or sideways, to keep momentum going."
INPUTS
THE DIRT: Clay loam or topsoil mixed with clay is best. A 40 x 30—foot area takes 27 cubic yards.
1. Choosing the Frame
Want to make a good quality bike? Make sure you choose the right frame.
2. Installing The Headset, Stem And Fork
You will find frames with an integrated head tube. What you need to buy is an integrated headset. Now, check if your fork has an integrated headset race.
3. Installing Bottom Bracket, Crankset And Peddles
It is time to install the crankset and peddles. Flip the bike and let it rest on its handlebars and seat. To step further, you need to take care of the bottom bracket first. Bottom bracket consists of two bearings and an internal spacer that holds the crankset.
4. Pedals
Before starting the installation, apply grease to the threads of each pedal. Then with the help of a pedal wrench, attach both of them to each side of the crank arm.
5. Wheels
The front wheel will be mounted on the fork. Make sure, the safety washers are fully engaged in their holes. Then tighten the lock nuts on both sides.
6. Chain
First, wrap the chain around the back sprocket. After that, wrap it around the front sprocket. Join both the ends of the chain together. Make sure every master link is connected with each end of the chain. Every two pins of the master link need to be connected with a plate.
7. Breaks And Levers
You need to slide the levers onto the handlebars. But you can orient them whatever position you like. Take your time and try sliding it on different positions and choose a comfortable position. Then, tighten the levers with appropriate wrench.
1. Pool noodles
Crab walk or bear crawl through a rainbow of hoops, practice movement skills while hopping on one foot or jumping through taped-together rings on the ground, zig-zag through vertical noodles stuck in the ground, and work on throwing with a giant target game.
2. Scrap lumber
Get ready to walk the plank! Or maybe it’s a tightrope, a gymnastics beam, or a log over a ravine. Place a beam across a round stump and make a seesaw to walk across. These activities will challenge kids’ coordination and vestibular system.
3. Tunnels
Crawl-through fabric tunnels make a perfect obstacle. If you don’t have one at home, a large cardboard box or a blanket draped over two chairs is also fun.
4. Stumps
Place a pool noodle across two stumps and create kid-friendly (and short!) hurdles to run and jump over. Step, step, step across them, or roll one through the grass. Use the stumps as anchors to create a rope maze to belly crawl under.
5. Any kind of ball
Use a bat, hockey stick, or even a broom to help develop hand-eye coordination while coaxing the ball across a finish line. Want a bigger challenge? Try using a balloon.
6. Ninja quintuple steps
If you have plywood, 2x4s, tools, and time, these slanted steps look amazing. I’m going to scour the garage and see if we can build a set.
7. Bean bags
Sew your own at home with dried beans or rice and some scrap fabric, and toss them onto a board painted with numbered circles, or try to get the most into a bucket or laundry basket. Toss all your bags and then move on to the next obstacle!

Popular Posts:
- 1. which institute is best for medical transcription course in bangalore
- 2. what is financial management course
- 3. what is the best lsat prep course to take
- 4. how to write a college course curriculum
- 5. how long is billing and coding course
- 6. how long is medical assistant course
- 7. what is pmp training course
- 8. what is a course management system
- 9. what is business management course
- 10. how long is hvac course