Part 1: Installing (Restoring) a Course in Blackboard
- Navigation Bar. Click on System Admin in the top right corner of the screen.
- Administrator Panel. Click on Courses in the courses section of the Administrator Panel.
- Courses. Hover over or click the Create Course button and then click on Restore.
- Restore Course. Create a Course ID in the Destination Course ID text box. ...
Full Answer
How do I backup and restore a Blackboard Learn course?
Archive a course. On the Administrator Panel in the Courses section, select Courses. Point to Backup Actions and select Archive Course. In the Source Course ID box, type a valid course ID. If you do not know the exact course ID, select Browse …
How do I restore a course?
How do I recover a Blackboard course? You can restore a course from an automatically created archive. Navigate to the Administrator Panel > Courses. Select Create Course > Restore. For the restored course, type a destination course ID. How can you create a …
How do I import course packages back into Blackboard Learn?
How do I archive a course?
How do I restore a course on Blackboard?
Restore a course from an automatically created archiveGo to the Administrator Panel > Courses.Select Create Course > Restore.Type a destination course ID for the restored course.Under Restore from Automatic Archives, select Browse Content Collection.More items...
Why did my course disappeared on blackboard?
Courses may not appear in the My Courses module in Blackboard for a few reasons: The instructor has not yet published the course for student view (most common reason). The student has not yet successfully registered and paid for the course. There may be an issue with the student's enrollment.
How do I find my old course on Blackboard?
Log into Blackboard and go to My Courses.If the course code still appears in your list, then you can download your past assessment or assignment from the My Interim Results tab.If it is not in your list, contact the Course Coordinator to check if they have a copy filed.
How do I reopen a course on Blackboard?
Log into Blackboard Learn and enter the course. In the Course Management menu under Customization, click Properties. Under Set Availability, check the radio button next to "Yes" for Make Course Available. Click the Submit button.
How do I unhide a course on Blackboard?
To show a hidden course, filter the list by Hidden from me > open a course's menu > select Show course.
How long does it take for courses to show up on Blackboard?
It takes 24 hours for student courses to reflect in Blackboard. For your information, if you have registered for the course in the past day, please give the system 24 hours to add you into the Blackboard course.Jan 15, 2021
System backup and recovery
Administrators should backup the database and file system according to the needs of the Institution. Blackboard Learn supports full backup and restores at the operating system and database levels. As a general rule, daily backups should be kept for two weeks, as errors may not appear for several days.
Incremental data protection
Blackboard Learn includes the following utilities for incrementally backing up individual courses and organizations:
Avoiding recovery of files during upgrade
During a Blackboard Learn upgrade, items such as custom folders and archived snapshots that are stored directly beneath the blackboard_home directory are moved to a time-stamped backup directory. Customized files and folders that are not Blackboard-owned will be considered unexpected and moved to the backup directory.
What is the Blackboard Learn tool?
Blackboard Learn includes the batch_ImportExport tool for handling the import/export and archive/restore of a number of courses at once as well as the import/restore of files that exceed the default maximum upload limit.
What is archive package?
Archive packages include course content, user data, and user interactions. Archive packages are designed to provide a permanent record of a course. To save course materials to teach another set of students at a later time, export the course instead of archiving it.
What is the default size limit for uploading files?
The default size limit for content uploaded though the user interface is 2.5 GB. When attempting to upload files larger than 2.5 GB using the interface, users will receive an error. This limit does not apply to web folder or shared location (WebDAV) uploads.
How to include content collection in Blackboard?
To include Content Collection files in the restore, select Select Folder. Select Browse to navigate to the folder. Blackboard Learn creates a sub-folder and copies the Content Collection files into it.
Can you unzip an archive package?
Store archive packages in a secure location. Do not unzip or extract a course or archive package. Do not remove files from the package or try to import a file contained with the package. You can only import or restore the course if the package is intact.
Can SafeAssign be restored?
SafeAssign assignments aren't included in the archive and can't be restored. To learn more, see SafeAssign. The method for archiving cross-listed courses is to archive the parent course. Only parent courses have content, and archiving the parent course includes the child courses.
How can I view my Blackboard classes?
Check out the Courses page. You can see a list of all of your courses from the place where your name appears. You can view all your courses on the Courses page. The page you see after logging in is controlled by your institution.
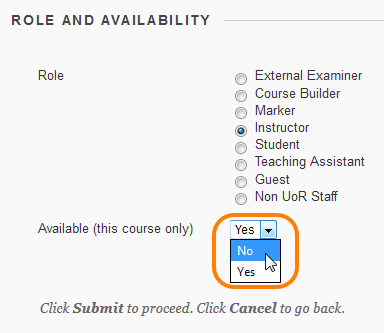
What does the Blackboard definition of available look like?
These settings control whether or not a user has access to the course. To be added back to the course, the student must submit a readmission request. If the availability settings are changed back to Yes, then the availability of the user will revert back to No the following day.
How can I create a Blackboard Collaborate link?
To add a Blackboard Collaborate Ultimate link to your course menu, click the plus sign at top, left of screen and choose Tool Link from the menu. The Add Tool Link window will open. Here you can set the name, type and availability of the link to be added to your course menu.
Blackboard: Why did my grade disappear?
Sometimes, students will see their grades in Blackboard but they flash briefly and then disappear. Blackboard may have used an incorrect filter to show grades.
How can I locate my Blackboard course syllabus?
Click on the Syllabus Area in the course menu. Click on the Build Content menu to select Syllabus.
How do I recover a Blackboard course?
Navigate to the Administrator Panel > Courses. Select Create Course > Restore. For the restored course, type a destination course ID.
How can you create a computer-based course of training?
You can create your own computer-based course by using authoring software to create instructional modules. Students can then access them using a course management system. Begin each lesson with a statement about the learning objectives.
System Backup and Recovery
Incremental Data Protection
- Blackboard Learnincludes the following utilities for incrementally backing up individual courses and organizations: 1. Export/Import: Export takes course content and puts it in a package that can be used in another course at a later date. One or more course areas can be included in the package. 2. Archive/Restore: The Archive Course function create...
Avoiding Recovery of Files During Upgrade
- During a Blackboard Learn upgrade, items such as custom folders and archived snapshots that are stored directly beneath the blackboard_home directory are moved to a time-stamped backup directory. Customized files and folders that are not Blackboard-owned will be considered unexpected and moved to the backup directory. To avoid your customized non-Blackboard-owne…
Popular Posts:
- 1. which institute is best for medical transcription course in bangalore
- 2. what is financial management course
- 3. what is the best lsat prep course to take
- 4. how to write a college course curriculum
- 5. how long is billing and coding course
- 6. how long is medical assistant course
- 7. what is pmp training course
- 8. what is a course management system
- 9. what is business management course
- 10. how long is hvac course