
4:00
13:43
Once you start with your bottom row. Sometimes it gets difficult for me to explain things becauseMoreOnce you start with your bottom row. Sometimes it gets difficult for me to explain things because it's easier to show it sometimes which I'm going to do so.
When tiling a wall where do you start?
Where do you start when tiling a wall? It’s always advisable to start tiling your grid in the centre of the wall, as it’s easier to make sure your pattern is symmetrical. It also means any half-tiles you may need can go at the end of each row and will be of matching size.
What's the best way to install tile on a wall?
The Simple and Mess-Free Way to Install Tile
- Prep the Wall. STEP 1: Remove the old backsplash and patch the wall if necessary. ...
- Create the Tile Layout. STEP 4: Measure the size of the backsplash. ...
- Attach the Tiles. STEP 7: Cut SimpleMat to fit your tile layout. SimpleMat comes in a 9-inch-by-40-foot roll or in 9-inch-by-18-inch sheets.
How to properly tile a wall in your home?
Project step-by-step (4 ).
- Examine the Surface area. Ensure all the tiles are solidly bonded to the floor by tapping them lightly with a wood mallet or a chunk of 2×4.
- Grind Off the High Spots and Tidy the Tiles. Lay a 4-foot level on the old tile and mark any high spots. ...
- Spread Adhesive. ...
- Set the Tile. ...
How to install heavy tile on a wall?
Tips for Tiling a Wall
- Hang a Batten Board to Prevent Tile Slippage. A batten board helps you start your bottom-most course or row of tiles. ...
- Install the Wall Tile in a Pyramid Shape. So, you've got that bottom row of tile. ...
- Check Your Floor for Level and Walls for Plumb. Tiles are square. ...
- Use No Tiles Less Than Half-Wide. ...
How do you start the first row of wall tile?
0:442:27How to Tile a Bathroom 34: Tiling the First Row - YouTubeYouTubeStart of suggested clipEnd of suggested clipYou would just find your line and marking on the side here. And mark it on the side here and thatMoreYou would just find your line and marking on the side here. And mark it on the side here and that would be your cut. So then when you have it all set and done you take that cut piece you test it out.
Where do you start first row of shower tile?
Today we're going to share a lot of tips with you and in the end you'll be more confident to start setting tile in your bathroom. Always tile the back wall first in a shower/tub so that you can hide the grout joints on the sides.
How do you start the first row of backsplash tile?
2:056:38How to Install a Tile Backsplash, Part 1 -- Buildipedia DIY - YouTubeYouTubeStart of suggested clipEnd of suggested clipWe'll. Start on the ends. And work toward the corner. And lay the tile up from the countertop. ThisMoreWe'll. Start on the ends. And work toward the corner. And lay the tile up from the countertop. This way our cuts are hidden in the corners. And under the bottom edge of the cabinets.
How do you start a tile line?
0:192:37How to Layout a Tile Floor - YouTubeYouTubeStart of suggested clipEnd of suggested clipLine start at the center and strike an arc at four. Feet. Then make a mark three feet from theMoreLine start at the center and strike an arc at four. Feet. Then make a mark three feet from the center along the chalk. Line strike a second arc from that three foot mark to cross your first arc.
How do you layout wall tiles?
0:184:51How To Tile A Wall - 1/3 - Getting The Layout Right - YouTubeYouTubeStart of suggested clipEnd of suggested clipSo ideally what we need to do first of all taking oval as an example here ideally we're going toMoreSo ideally what we need to do first of all taking oval as an example here ideally we're going to find the center of the wall first of all. So once we found our Center we can then work out evenly.
How do you start tiling a bathroom wall?
1:5812:32How to Tile a Bathroom Wall with Wickes - YouTubeYouTubeStart of suggested clipEnd of suggested clipPlace the tiles along its length including spaces and mark onto the baton. Then find the horizontalMorePlace the tiles along its length including spaces and mark onto the baton. Then find the horizontal midpoint of the wall and mark this point with a pencil. Hold your tile gauge on to this point.
Do you start backsplash in corner?
Step 1: Lay Out Your Backsplash Tile Design If you are doing a straight wall—like my laundry nook, it's best to start at the center and work your way outward. However, if you are doing a corner, it's better to start in the corner and work your way out.
When tiling a wall Do you start at the top or bottom?
Here's how you do it: Install the first four tiles in a pyramid: three on the bottom and one on top. Every subsequent row is a process of draping over the pyramid, back and forth. Begin your first drape on either the right or left side, and bring it up, over, and down the other side.
Where do you start tiling a kitchen wall?
3:1810:49How to tile a kitchen wall - YouTubeYouTubeStart of suggested clipEnd of suggested clipIf your tiling between two walls you should always start from the center of the wall. And workMoreIf your tiling between two walls you should always start from the center of the wall. And work towards the corners. Don't start in a corner otherwise.
How do you start laying ceramic tile?
0:031:21How to Lay and Install Ceramic Tile | The Home Depot - YouTubeYouTubeStart of suggested clipEnd of suggested clipAnd porcelain tile. It's very important to make a detailed floor plan and create layout lines in theMoreAnd porcelain tile. It's very important to make a detailed floor plan and create layout lines in the room snapping a chalk lines from the center of two opposing walls across the floor can create these
Can you start tiling in a corner?
Most of the tiles will need to be cut to fit the perimeter of the room; starting in a corner allows you to begin the pattern with full tiles on a straight line and move evenly into the room. In this case, beginning in the center may make it more difficult to get the pattern moving evenly.
How do you stagger wall tiles?
0:361:40How to Stagger a Tile Floor : Flooring Repairs - YouTubeYouTubeStart of suggested clipEnd of suggested clipSo what we want to do is start with our first tile. Right here put the corner of it right in thatMoreSo what we want to do is start with our first tile. Right here put the corner of it right in that inner crossing. Line now what we're going to do is we're going to measure the length of this tile.
How to arrange wall tile?
If it seems complicated, try this: Install tiles one through four as directed. Then every subsequent "row" is a process of "draping over" the pyramid, back and forth. So: Tiles one, two, three, and four. Begin your first "drape" on either right or left side, and walk it up, over, ...
What is a sliver on a tile field?
Along the outside of your tile field, any tile "slivers" (tiles that are less than half the width of the tile itself) will markedly show the out-of-plumb wall. You can remedy this by making sure that the tiles are positioned so that no "slivers" are used. Read More.
Is vertical tile more visible than horizontal tile?
Vertical (wall) tiles are more visible than horizontal (floor) tiles. Vertical tiles can slide before they are firmly set into place. Walls, windows, doors, and other reference points can create aesthetic havoc with wall tile.
Do you need to put tile in a square?
Holding a bubble level to a straight, six- or eight-foot board, make sure that both walls and the floor are plumb (vertical) and level. Surprise: they won't be.
Is tile wall installation a piece of cake?
Veterans of floor tile installation may think that wall tile installation is a piece of cake. After all, it's nothing more than a vertical floor. However, wall tile installation has its own set of rules that you dare break at your own risk.
How much does a ceramic tile pack cover?
Once you’re sure of the maths, you can go ahead and buy your tiles. Most ceramic tile packs cover a square metre, but we’d recommend having around 5-10% extra just in case.
How to draw a line across a wall?
Using a long straight edge and spirit level, draw a line across the wall from the mark: Check behind the wall for any cables or pipes, then nail your 50mm x 25mm batten. Its top edge should be aligned with the horizontal pencil line, and should be straight. Then use another batten for the vertical line.
Can you lay tile without cutting?
If there’s only a slight curve, or the edge is totally straight, you can lay the first row level to it without having to cut tiles. We suggest using either cardboard or paper spacers to guide you while the adhesive dries, which can then be removed and the join filled with sealant. Step 1.
Do you need corner trim on glazed tile?
Bevelled or rounded glazed edge tiles usually mean you won’t need corner trim. Tile the first wall right up to the edge of your space then do the same for the return, allowing the corners to overlap. Be sure to leave a gap for grouting, too. Step 1.
Do you have to cut tile for top and bottom rows?
With any luck, the wall and rod lines will match up and you won’t have to cut any tiles for the top and bottom rows. If not, simply halve the distance between the wall and rod marks and, as with the vertical rows, make sure it’s more than half a tile wide.
How to backbutter tile?
Backbuttering tiles ensures a good bond with the wall thin-set. Embed tile into the thin-set on wall. Clean the thin-set off the tile surface with a sponge and water. It’s a good idea to do this cleaning process as you tile the wall. Double check your tile measurements before cutting the next tile.
What is the gap between a tub and tile?
Bathtubs, believe it or not, will expand when filled with water. Leaving a 1/16″ gap between the tub and tile will prevent the tile from cracking when the tub expands. Plus, a 1/16″ gap allows the caulk to properly fill the space and waterproof the transition between the tile and tub or shower.
What is the best thin set for vertical tile?
There are two types of thin-set we like: Ardex X 77 and Mapei’s Kerabond. Ardex’s X 77 is considered one of the best thin-sets for vertical tile because of it’s bond strength. We use it exclusively for large format tiles on the wall because the tiles stay put.
What is tile in construction?
A tile is a thin object usually square or rectangular in shape. A tile is a manufactured piece of hard-wearing material such as ceramic, stone, metal, baked clay, or even glass, generally used for covering roofs, floors, walls, or other objects such as tabletops. Alternatively, tile can sometimes direct to same units made from lightweight materials such as perlite, wood, and mineral wool, typically used for wall and ceiling applications. In substitute sense, a tile is a construction tile or same object, such as rectangular counters used in playing games (see tile-based game). The word is derived from the French word tuile, which is, in turn, from the Latin word tegula, meaning a roof tile composed of in flames clay.
What is a tiler?
Tilers (WikiPedia) A tile is a thin object usually square or rectangular in shape. A tile is a manufactured piece of hard-wearing material such as ceramic, stone, metal, baked clay, or even glass, generally used for covering roofs, floors, walls, or other objects such as tabletops.
Why do you need spacers for wall tiles?
When installing wall tiles, spacers help to keep the space between the tiles even so that your grout will appear the same. Uneven grout can ruin your important home project by making your entire tile work look sloppy. While even spacing is important for the overall look of the backsplash, you may wonder if you must have a thin grout line where ...
Can outer walls cause cracking?
Outer walls tend to experience dramatic temperature fluctuations and not allowing this space can cause cracking and displacement later on. The manufacturer’s directions. If the directions included with your tile specifically require spacers, then use them. Failure to do so could result in your warranty being canceled.
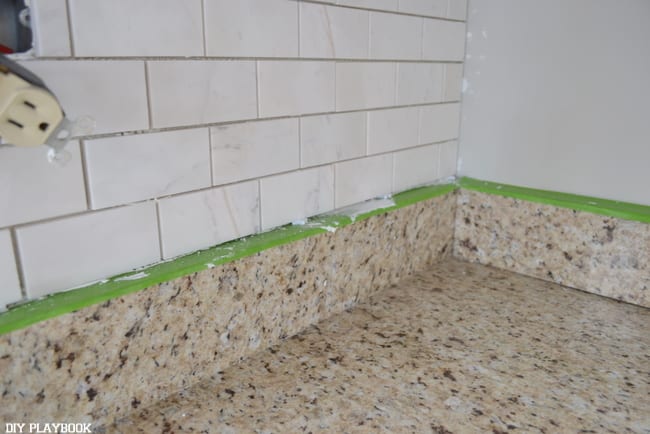
Do you need grout line for backsplash?
While even spacing is important for the overall look of the backsplash, you may wonder if you must have a thin grout line where the tile meets the countertop and cabinets. This will depend on a few important factors: The type of tiles being used. Some wall tiles come with built-in lugs (spacers).
Can you cut tile in the first row?
Depending on how uneven the area is , you may have to make more cuts to fit the tiles in this first row, but that’s okay. The extra work will be worth your time and trouble because it will make the rest of your tile backsplash installation much easier.
Do you need to space glass tiles?
If you are using glass tiles sheets or subway tiles, you probably will not need spacing here and can install them flush to the countertop and cabinets. The temperature of the kitchen. The main reason a space is left between counters and cabinets is to allow the tiles to expand and contract with different season.
Can you put tile backsplash without grout?
If you prefer one look to another, be sure to check with your manufacturer and installer to ensure that the tile backsplash you pick can be installed with or without a grout line at the seams of you counters and cabinets. Then get to work. Your new kitchen awaits.
What happens if the wall isn't straight?
If the wall isn't straight and you start a full course of flooring against it, then the whole floor will look crooked. The solution is to angle-cut the lengths of the first and last courses for your laminate floor layout pattern, so the floor is straight even if the walls aren't. Advertisement.
How to make a chalkboard?
Set your chalk line on the 1-inch mark at the end of the final board. Stretch the line to the far end of the course, and put it right on the corner of the end of the last piece, on the side closest to the wall. Snap the line. The resulting line should run at an angle from your 1-inch mark at one end of the course, to the corner of the other end, crossing each of the boards that make up the course.
Can laminate flooring be installed in an unsquare room?
Installing laminate flooring in unsquare rooms is remarkably easy, since most systems today are "floating" floors that don't require glue or nails. But laying out the laminate floor layout pattern ahead of time can still be complicated, especially in an older home with out-of-square walls.
Popular Posts:
- 1. which institute is best for medical transcription course in bangalore
- 2. what is financial management course
- 3. what is the best lsat prep course to take
- 4. how to write a college course curriculum
- 5. how long is billing and coding course
- 6. how long is medical assistant course
- 7. what is pmp training course
- 8. what is a course management system
- 9. what is business management course
- 10. how long is hvac course