- Log into Blackboard at http://learn.uark.edu.
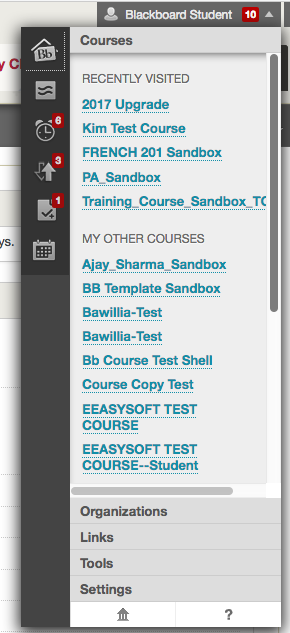
- Click on the Courses link in the left menu.
- Click Course Catalog in the top right.
- Click Browse Categories to see only courses belonging to that category. If you are signing up for Blackboard Training, click Blackboard Training in the Browse Categories list.
- Hover over the name in the ID column and click on the down arrow button that appears.
Hover over the name in the ID column and click on the down arrow button that appears.
- Click Enroll.
- Click Submit on the resulting page, then Ok.
- Click OK.
- The course will either appear under Current Courses or Training in Blackboard when you login.
Feb 3, 2021
How to create and add a course on Blackboard?
Create a course. On the Administrator Panel, in the Courses section, select Courses. Point to Create Course and select New. You can merge existing sections, allowing instructors to manage multiple sections of the same course through a single master course. To learn more, see How to Merge and Separate Child Courses.
How to put your course on Blackboard?
What you'll learn
- Create a course on the Blackboard platform
- Customizie your Blackboard page
- Upload documents to your Blackboard page
- Put your assignments on the Discussion Board
- Create tests in Blackboard
How to make a course available?
These courses will be available on Platzi and will seek to train thousands of creators through five courses, live sessions with experts, and access to a community of creatives. This will allow creators to develop Spark AR content such as filters ...
How to add someone into your blackboard course?
To manually enroll as user into a Blackboard Learn course:
- Enter the course you want to enroll a non-registered user. ...
- Navigate to: Control Panel > Users and Groups > Users.
- Click the "Find Users to Enroll" button.
- On the "Add Enrollments:" screen, click the "Browse..." button. ...
- Locate the user using the Search toolbar on the page. ...
- Select the check box next to the user, then click the "Submit" button.
How do I enroll in a course on Blackboard app?
On the Administrator Panel in the Courses section, select Courses. Search for a course. On the Courses page, open the course's menu and select Enrollments. On the Enrollments page, select Enroll Users.
How do I access a course on Blackboard?
Accessing your course sites on Blackboard On the My Blackboard landing page, links to course sites in which you are enrolled as a student should appear in the Advanced My Courses panel. To access each unique course site, click on the appropriate link.
How do I enroll in Blackboard?
Hover over the course/organisation you need, click the arrow next to the course ID (1), then click Enrol (2). You may be required to enter an access code, do so on this screen. Then Click Submit to confirm your enrolment. Click OK to be taken to the course/organisation.
How do I join an online class on Blackboard?
0:031:11Join Blackboard Course Room - YouTubeYouTubeStart of suggested clipEnd of suggested clipAnd select courses. And then click on the course name that you would like to enter. From here on theMoreAnd select courses. And then click on the course name that you would like to enter. From here on the left-hand side you'll want to click on join session. And course room this will open up a new tab.
Why does my Blackboard say I am not enrolled?
There are two reasons a student might encounter this message: The student is not registered for any courses in Banner. The instructor may not be using Blackboard or hasn't made the course available to students yet.
How long does it take for courses to show up on Blackboard?
When you register for a class you are automatically enrolled into the Blackboard system for that course within approximately 6 hours. However, there could be several reasons why you may not see a Blackboard course. I'm a new or returning student who registered for courses.
What can a guest do in Blackboard?
Guests will only have access to course content, assignments, and the syllabus. Guests will not have access to tests, discussion boards, and most course tools. For a guest to be enrolled in a Blackboard course, they must first have a VUnetID.
Where is the administrator panel in Blackboard?
Open the Admin Console From the Administrator Panel, under Tools and Utilities, select Admin Console.
How do I join Blackboard Collaborate as a guest?
Click the button with the three dots to the right of the course room or session name....On the Event Details tab:Check the Guest Access checkbox to allow guest access.Select the desired role from the Guest Role dropdown menu (Participant/Presenter/Moderator)Click the Save button to update the session settings.
How do Blackboard classes work?
You deliver course materials in the online format. You communicate and interact with students with online tools. Students interact, communicate, and collaborate online. You assess student work online.
What is the Google ID for Blackboard?
Google sends a Google ID, basic profile information, and your Google email address to Blackboard so that you can sign in to your school's website. The basic profile information includes your first and last name, email, image, and locale, which is your region and language. No other information is shared and your Google and Blackboard accounts remain ...
How to subscribe to a website?
To get started, sign in to your site. Select My Account and Edit Account Settings. Select Subscriptions. Select Manage Subscriptions. Select Sites and select sites to which you wish to subscribe to the homepage and calendar. Select Other Areas to subscribe to additional areas. Select I'm Done.
What happens if you register and sign in?
If you do register and sign in, you may have access to additional features and information. For example, as a registered user, you can access details specific to you and register for calendar events.
How to retrieve a forgotten password?
To retrieve a forgotten password, select Forgot My Password and type your user name. You'll receive an email with a link to reset your password. If you've forgotten your user name or have an issue with your email address, contact your site administrator.
How to prohibit unauthenticated users from enrolling in a course?
To prohibit unauthenticated users from enrolling in the course, select No. Categories. Select Course Catalog Category. The category determines where the course description appears in the course catalog. Select a category to select it and select the right-pointing arrow to move it to the Selected Items list.
How to limit enrollment in a course?
To limit enrollment to a specific time period, select the Start Date and End Date check boxes and enter the dates and times between which users can enroll in the course. To limit enrollment to users with an access code, select the Require an Access Code to Enroll check box. Provide the text to use for the access code.
How to make a course available in more than one institution?
To make a course available in more than one institution, select Find Node. Select whether to search for the node by Name, Description, or Identifier. Select a search condition from the menu: Contains, Equal To, Starts With, or Not Blank. Provide the search term and select Go.
How to limit course availability?
To limit course availability to a specific number of days after a student enrolls, select Days from the Date of Enrollment and provide the number of days. Course View Options. Choose a course view option.
What is a term and course start/end date?
Both term and course start/end dates are used to organize courses into a timeline on the Courses page for instructors and students. When you make a course unavailable, students can see it in their course lists, but can't access it. Instructors see unavailable courses in their course lists and can access them.
When can instructors open courses?
Instructors can open courses when they're ready for students to participate. Duration. This defines the time period the course will remain available. Original Course View: Available courses are open to students to access or self-enroll in if a course allows self-enrollment.
Can you change course IDs after creating them?
You can use numbers, letters, hyphens (-), underscores (_), and periods (.). All other characters, including spaces, are prohibited. You can't change course IDs after you create them.
Can you switch to Ultra Course View?
The first time you or an instructor with the correct privileges accesses a newly created course, it appears in the Original Course View, but you can switch to the Ultra Course View. The only exception is if you enforced the use of the Ultra Course View for new courses when you configured the Ultra experience.
How to enroll multiple users in a course?
Enroll users in a course. If you want to enroll multiple users in a course, enroll them in groups based on their course roles. You can select one role per set of users. For example, if a course has one or more instructors, enroll them first. Then, move on to students. Optionally, you can enroll all users with a role of Student ...
What happens when you merge a course into a master course?
When you merge a course into a single master course, its students are enrolled automatically in the merged master course. However, when students enter the course, they'll see only the course ID of the child course they were originally enrolled in. To learn more about merging courses, see Merge and Separate Courses.
Can you override enrollments?
If you have students who need to access a course outside of the normal term, you can override their enrollments. They'll have access to the course until the date you set.
Can you change a user's role in a course?
You can change a user's role in a course at any time. For example, if an instructor needs an additional assistant during the term, you can change a user's role from Student to Teaching Assistant for that course.
Can you delete a user from Blackboard?
Removing users from a course doesn't delete the users from Blackboard Learn. After you remove a user from a course, the user can no longer access course materials or user interactions. The user is no longer enrolled in the course. You can't automatically restore users to courses after you remove them.
Can you create multiple courses on Blackboard?
In Blackboard Learn, you can create courses in several ways. If you have appropriate privileges, you can create new courses, copy existing courses, create multiple courses at once with a batch file, and restore and import courses—all from the Administrator Panel.
Can you open the course catalog in Ultra?
Course catalog. You can allow users and guests to open and browse the course catalog in the Ultra experience. Available courses in the Original Course View appear in the course catalog. Users can open the courses, view contents, and self-enroll if allowed. More on the course catalog.
Can you make a course private?
Instructors can make their courses private while they add or experiment with content, and then open courses to students when they're ready. Students see private courses in their course lists, but they can't access them. Users can view the Courses page as a list or a grid. In grid view, instructors can customize the image on their course cards.
How to enroll multiple users in a course?
Enroll users in a course. If you want to enroll multiple users in a course, enroll them in groups based on their course roles. You can select one role per set of users. For example, if a course has one or more instructors, enroll them first. Then, move on to students. Optionally, you can enroll all users with a role of Student ...
What happens when you merge a master course?
When you merge a course into a single master course, its students are enrolled automatically in the merged master course. However, when students enter the course, they'll see only the course ID of the child course they were originally enrolled in.
Can you change a user's role in a course?
You can change a user's role in a course at any time. For example, if an instructor needs an additional assistant during the term, you can change a user's role from Student to Teaching Assistant for that course.
Can you remove a user from Blackboard?
Removing users from a course doesn't remove the users from Blackboard Learn. After you remove a user from a course, the user can no longer access course materials or user interactions. The user is no longer enrolled in the course. You can't automatically restore users to courses after you remove them.
Register and Pay for Your Course
After you have signed in, the Select an Option page asks you how you want to pay for your course.
Registration Complete
After your registration is complete, you see the confirmation page and get a confirmation email. You are ready to start working in your MyLab & Mastering course.
Popular Posts:
- 1. which institute is best for medical transcription course in bangalore
- 2. what is financial management course
- 3. what is the best lsat prep course to take
- 4. how to write a college course curriculum
- 5. how long is billing and coding course
- 6. how long is medical assistant course
- 7. what is pmp training course
- 8. what is a course management system
- 9. what is business management course
- 10. how long is hvac course