If you would like to preview course material to copy: Go to the D2L home page Scroll down the page, and look for the Preview Courses widget.

0:00
1:20
Or draft. Option that's here on the right-hand side in d2l 10.3 published means visible and draftMoreOr draft. Option that's here on the right-hand side in d2l 10.3 published means visible and draft means hidden. So by clicking bulk edit I then have the option to switch any module.
How do I activate a D2L course?
The course must be activated using the Course is activecheck box on the Course Offering Informationpage. The D2L family of companies includes D2L Corporation, D2L Ltd, D2L Australia Pty Ltd, D2L Europe Ltd, D2L Asia Pte Ltd and D2L Brasil Soluções de Tecnologia para Educação Ltda.
How do I allow students to submit a quiz to D2L?
Note: You must "allow attempt to be set as graded immediately upon completion" by D2L if students are to see the Submission view upon submitting their quiz. Select Quizzes from the course navbar. Click on the quiz name. Select the Submission Views tab.
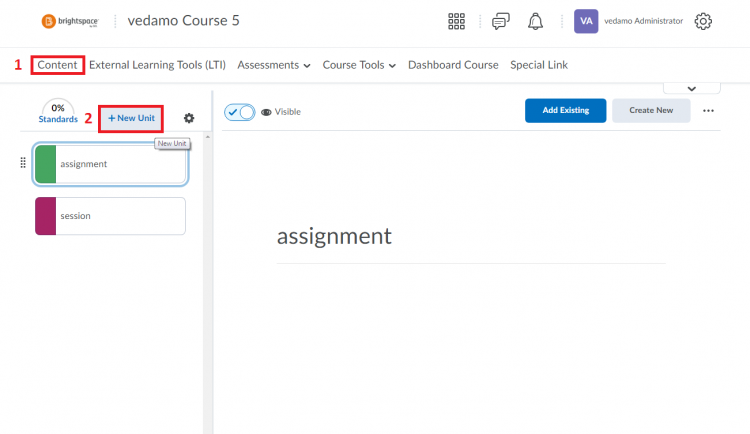
How can content be made visible or hidden to learners?
Content can be made visible or hidden to learners using a quick ‘hide/show’ toggle, or by using release conditions to personalize the pace and path for individual learners. While building and teaching the course, it’s easy to see how the course satisfies the required outcomes, expectations, or standards.
How do I view and print course content?
Also Required: View Course Content Allows users to: Print Course Overview, Bookmarks, Upcoming Events, Table of Contents, and Modules in a printable format Users will see: The Print icon in the Content tool's Course Overview page, Bookmarks page, Upcoming Events page, and Table of Contents page, and inside a content module
How do you change visibility in D2L?
Change visibility for eventsOn the navbar, click Calendar.From the tool navigation, click List.Select the check boxes by any event for which you want to make visibility changes.From the More Actions button, click Change Event Visibility.From the Event Visibility drop-down list, select your visibility preference.More items...
How do I make content visible on Brightspace?
Go to Content in the navbar of your course. Click the desired module. Click on the eye icon on the top right. A bar will appear which you can use to make the (sub)module Visible or Hidden.
How do I unhide content in Brightspace?
If a topic or module is already hidden, the hidden icon indicates its status. Open the context menu and select Make Visible to Users to allow user access.
How do I make my Brightspace course visible to students?
Activate Your CourseFirst, log into Brightspace and enter the course.In the NavBar, click Course Admin.Under Site Setup, click Course Offering Information.Click the box under Active, then Save.
How do you make a course unavailable on Brightspace?
Click on Resource in the navigation bar. In the menu that opens, click Course Admin. Follow the Course Offering Information link. Uncheck the box next to Course is active.
How do I change the start date in D2L?
To change the start and end dates of a D2L course:Click on Resource in the navigation bar.In the menu that opens, click Course Admin.Click the Course Offering Information link.Adjust the Start Date and End Date as necessary.Click the Save button.
What is a submodule in Brightspace?
Modules and sub-modules help structure your D2L Brightspace course and make your course page easier to navigate for students. Modules are used to group or categorize course content and sub-modules are used to organize content within a module.
How do I create a sub module in D2L?
A module must be created before files can be added to a D2L course....Add a SubmoduleSelect the module where the submodule should be created.Select the "Add a submodule…" box.Enter a name for the submodule in the input-text box.Hit return (or enter) on the keyboard.
How do I hide my grades on Brightspace?
Hide Grade Items Go to the Restrictions tab. Here you find the options to directly hide the grade item from students, set a date range or to attach release conditions. Make your preferred selection and click Save and Close.
How do I publish a Brightspace course?
Click the (...) Options menu and select Publish to LOR....Publish course content to Brightspace Learning RepositoryTo include all original files in your new learning object, select Include all files from this course.To leave the page while your package is being built, select Publish in the background.More items...
How do I publish a class on Brightspace?
Publishing your courseGo to Course Admin in the Navigation bar.In the Course Administration screen, select Course Offering Information.Scroll to the heading 'Active' and tick the checkbox for Course is active.Select Save at the bottom of the screen.
How long does it take for a class to show up on Brightspace?
24-48 hoursPlease wait 24-48 hours after registering for a course to appear in Brightspace Learning Environment. The course may not be active. Your instructor is responsible for activating the course so contact them to see when the course will be activated. The course hasn't started.
Where is course admin on Brightspace?
Login to Brightspace and go into the appropriate course. When in the course, take these steps: select the "Course Admin" link in the upper right-hand corner of the course nav bar. select to sort by either "Category" or "Name" - in this case the sort is by "Name"
What does closed mean in Brightspace?
Courses may show up as Closed in your My Courses widget in Brightspace. The Closed tag appears when the last day of class has passed, typically before exams have completed.
How do you view closed courses on d2l?
In the Admin Tools menu, under Security, select Roles and Permissions. From the Administrator drop-down menu, select Edit Settings. Under Course Access Options, Select the Access Future Courses checkbox and/or the Access Past Courses checkbox. Click Save and Close.
How do I update Brightspace?
Update your coursesTo modify the start date of the courses, select the Update Course Start check box. Select a date and time.To modify the end date of the courses, select the Update Course End check box. Select a date and time.To modify the course status, select the Update Active check box. Select a status.
What is visibility toggle?
The visibility toggle enables you to control the visibility of units, lessons, folders, HTML documents, and web links at the time of creation.
What is Brightspace Learning Environment?
Brightspace Learning Environment has an alternative Content experience that provides an intuitive way to create lessons aligned to standards, outcomes, and expectations.
How to add content to a course?
1. From the course home page, go to Content. 2. Navigate to the module to which you wish to add content . 3. Click on the Upload/Create button.
Why is D2L important?
The importance of accessible (and usable) online content cannot be overstated. Users with visual impairments rely heavily on assistive technology such as screen readers (JAWS, NVDA, VoiceOver, etc.) to convert text into synthesized speech.This enables the user to listen to and comprehend the content. Users with various permanent, environmental, and/or situational limitations also use a variety of tools to assist them with navigating online content. Creating web (HTML) content in D2L can help such users gain equal access and become independent learners. Why is this important?
What is a bulleted list?
Bulleted (unordered) lists are used for a group of items without a sequence:
How to create a hyperlink in a document?
Copying and pasting the complete URL of a web page into a document creates a hyperlink automatically. Even though this is the easiest way to insert a link, the URL serves as the display text for the user and might become confusing for a screen reader or other user. Using descriptive link text provides the user with a clear understanding of the link destination. Screen reader users may skim a document by navigating from link to link. It is, therefore, important to avoid using ambiguous link text (such as “click here,” “read more,” or “link”) as it might become difficult to understand out of context.
Why is it important to have a contrast between text foreground and background?
Adequate contrast between the text foreground and background is important for users with low vision as well as other conditions. Something like the following text might be difficult to read for most users:
What are the two types of lists?
There are primarily two types of lists used: ordered and unordered. Numbered (ordered) lists are used to present a group of items (words, phrases, sentences) that follow a sequence or show an order of importance:
How do lists work?
Lists add important hierarchical structure to a document. Sometimes users create "lists" manually by hitting Tab to indent content. While this provides visual structure for sighted users, it does not provide the document structure needed for assistive technology users.
When a course is active, it becomes accessible to learners in the My Courses widget?
When a course is active it becomes accessible to learners in the My Courses widget, and in the Select a Course menu. If no Start Date and End Date are set in the Course Offering Information the course is immediately available for learners to access.
What happens if you don't select the course is active check box?
Important Note:If a Start Dateand End Dateare set but the instructor does not select the Course is activecheck box, the course does not become accessible to learners on the selected Start Date. The course must be activated using the Course is activecheck box on the Course Offering Informationpage.
Can you deactivate a course offering to hide it from learners without actually deleting it?
Tip: You can deactivate a course offering to hide it from learners without actually deleting it. This way the content (including user data) can be kept for future use.
Is D2L a trademark?
Brightspace, D2L, and other marks ("D2L marks") are trademarks of D2L Corporation , registered in the U.S. and other countries. Please visit www.d2l.com/trademarksfor a list of other D2L marks.
How to change the default view on quizzes?
Click on the quiz name. Select the Submission Views tab. Click the Default View link. If you wish, you can change the default message that students receive upon submitting their quiz. Select either Yes or No, to determine if students will be able to see the questions after they submit a quiz.
How to allow students to take a quiz multiple times?
If you allow students to take a quiz multiple times, you can release different information after each attempt. Select Quizzes from the course navbar . Click on the quiz name. Select the Assessment tab. Choose how many times you want students to Attempt the quiz and click Apply. Select the Submission Views tab.
Can students see the answers after submitting a quiz?
By default, student see neither the questions nor their answers after they submit a quiz. You can release that information to them by modifying the default submission view.
How to delete grades in a.stdout file?
Click Manage Grades tab. Click the action menu for More Actions and select Delete. Check the box at the top to select all items and click the Delete button. Click the Delete button again on the confirmation window.
How to delete a question in a folder?
Click the action menu for More Actions and select Delete. Click the Delete button on the confirmation window. Click on the Question Library link. Check the box at the top to select all the folders and questions. Click the Delete button. Click the Delete button again on the confirmation window.
Popular Posts:
- 1. which institute is best for medical transcription course in bangalore
- 2. what is financial management course
- 3. what is the best lsat prep course to take
- 4. how to write a college course curriculum
- 5. how long is billing and coding course
- 6. how long is medical assistant course
- 7. what is pmp training course
- 8. what is a course management system
- 9. what is business management course
- 10. how long is hvac course